If you're diving into data analysis, Sympathy for Data could be your new best friend. At its core, Sympathy's purpose is to create a seamless journey from raw data to actionable insights. But how does it achieve that? Let’s break it down.
Go directly to the full documentation on this topic by clicking here
Understanding the Basics: Nodes and Workflows
Think of a workflow as a roadmap of your data analysis process, with each stop or point on the map representing a specific task or operation - these are called nodes. These nodes, whether they're importing data, visualizing it, or performing some intricate analysis, are the workhorses of Sympathy.
And here's the cool part: both the nodes and the entire workflows can be shared! Imagine crafting an analysis process and being able to share that template with colleagues, streamlining everyone’s tasks.
d
Getting Started: Your First Node
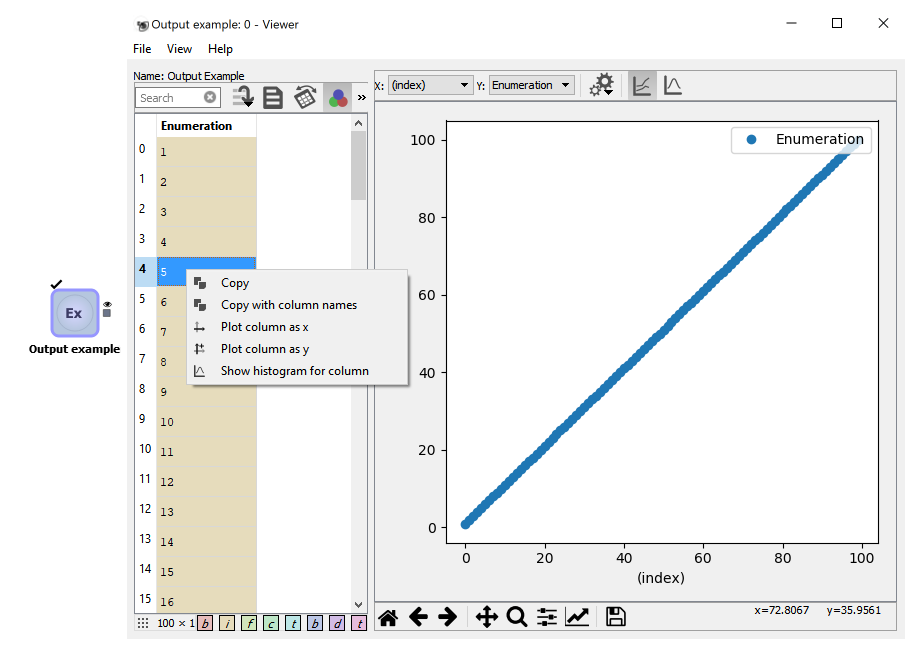
Launching Sympathy presents you with an untouched canvas - an empty workflow. But with the vast library to your left, you're far from unarmed. For starters, try adding the “Output Example” node. It's simple:
- Use the library filter at the top to type “Example.” This narrows down your node choices.
- Drag the “Output Example” node onto your canvas.
- Execute the node by double-clicking on it. Once done, it'll glow green, signaling success.
- Curious about what you've just created? Double click on the node's output port to view the results - a neat table numbered from 1 to 100.
This double-click method becomes indispensable when you're fine-tuning workflows.
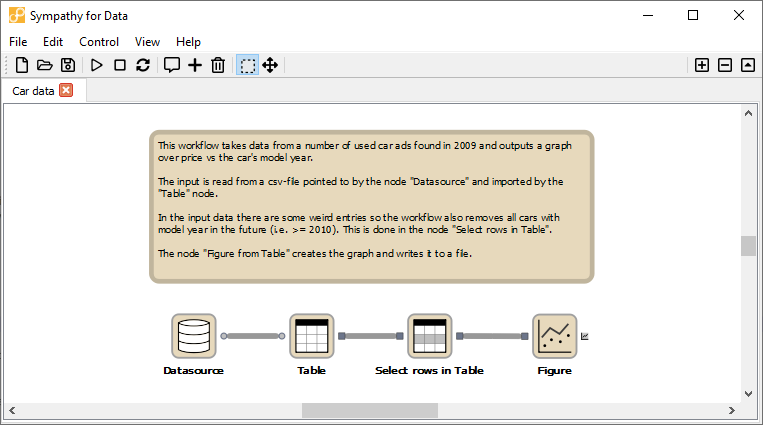
Exploring Example Workflows
Fancy a deeper dive? Sympathy has pre-built example workflows. To access one, navigate to Help -> Example flows -> Sympathy and select the Misc/Cardata workflow.syx. The canvas now illustrates a complex web of interconnected nodes.
The magic happens when you run the entire workflow by activating the last node. Don't forget to double-click the output port to visualize your results. And if you're ever in doubt, the help text offers a guide to what each node accomplishes.
Navigating with Context Menus
Sympathy loves its context menus. These pop up when you right-click, offering a range of actions like Copy, Paste, and Delete. The primary action? It’s the one at the top, which is also triggered by a double click.
Customizing Nodes
No two data sets are identical, and your nodes should reflect that. Right-click on any node and select 'Configure' to tweak its operation. For instance, want to filter data from before the year 2000? Simply adjust the configuration of the 'Select rows in Table' node.
Remember, each node can have its settings, and a quick glimpse into their configuration interface can provide deeper insight. If ever unsure, just hit Cancel and rest easy knowing your original setup remains unchanged.
Conclusion
As with any tool, the real power of Sympathy for Data is unlocked when you familiarize yourself with its intricacies. Whether you're filtering specific car brands or crafting complex workflows, understanding the basics of nodes and workflows sets you on a path of seamless data analysis. Dive in, explore, and soon, you'll be navigating Sympathy like a pro.

